Tuesday, March 16, 2010

Kitchen Facelift (Deployment Project #48)

Sometimes, you just really want to give a room a make-over, but time, resources, or the fact that you rent, makes it impossible.  I don’t think I have ever introduced you to my kitchen.  I really do like my kitchen in this house, but if I truly had my choices, I would paint the walls, paint the cabinets, change out the flooring, and put a light over the island!
IMG_4608
Remember that cute couch?  Read about it here!
IMG_4610
My kitchen in big enough for people to hang out while I’m preparing dinner - - it’s one of my favorite things about the kitchen.
IMG_4589
Have you noticed the boring builder beige walls?
Last week I posted about my fabulous find at Lowes – the recessed lighting conversion kit.  (I’m still in love if you were wondering!)  But it still wasn’t enough to quench my thirst for re-doing the kitchen.
IMG_4418
Have I mentioned I really REALLY REEEEEEEEEAAAAAAAAAAALLLLYYYYYYYYYY  want to paint the kitchen?  We actually did get permission from our landlord to paint. BUT – it has to be a neutral color and FLAT paint.  Flat paint?  That is pointless in a kitchen - - you can’t wash the walls when they are covered in flat paint.  Plus, after realizing how much paint these never before painted walls suck up - - I realized it was going to be quite costly.   AND, if we really are only going to be her one more year, that’s a lot of work for a short time to enjoy it.  So alas, I have come to the sad decision that I cannot paint the kitchen. (Insert sad face here!)
So, I gave my kitchen a mini-facelift on Saturday afternoon.  (Another side effect of not having a working sewing machine!)
Here is the before picture 
IMG_4589
And the after!
IMG_4598
I converted one wall of cabinets into a display area for all my white dishes!!
Here’s the quick how-to
Unscrew the hinges that are attached to the cabinets, taking the doors completely off. 
Measure the entire opening of each cabinet.IMG_4592
Measure and cut out your fabric so it perfectly fits inside the cabinet.
IMG_4593 
Using glue dots attach the fabric to the inside of the cabinets. 
 IMG_4597
Fill your shelves with a display of all your lovely white dishes!!
IMG_4599
Easily done in less than half an hour and what a difference it makes in my kitchen.  It ALMOST makes me forget about the fact that I want to paint it!!
IMG_4601IMG_4602  IMG_4619
IMG_4611
Plus, it is a fabulous place to display my lovely white soup tureens.  Handsome Hubby gets me one every year for Mother’s Day - - isn’t he the best?!!!
IMG_4604

Bathroom Re-do (Deployment Project #47)

What is a girl to so when almost all her projects revolve around a sewing machine and her machine breaks?  This isn’t the first time my machine has broken - - in fact, it was broken just a few months back ggggrrrrrr!  I’m beginning to wonder if I don’t have a lemon.  Thankfully it is still under warranty (let’s just do the math here…. I’ve had the machine for 10 months - - it’s been in the shop 3 times, and each of those times they have kept it for a month - - at this point, I’m thinking they should extend my warranty by 3 months!)
OK, moving on - - what am I supposed to do?  Time to pull out the paintbrushes and rollers! 
We have a little half bath downstairs - - perfect size for an evening project to get a little frustration out!  So, once the kids were in bed for the night, I pulled out my paint and started edging and rolling. 
Here’s the before:
IMG_4586 IMG_4588
Did I mention that it’s tiny?
IMG_4587
And the after!:
IMG_4612 IMG_4613
Recognize the quilt?  It’s the one I posted about here. IMG_4614  IMG_4616 OK, time to be honest.  I always use oops paint and doctor it up to make it the color that I want.  I had a quart of paint for this room - - as you can see, that was not enough.  I did get some more paint, I just haven’t had a chance to fix this spot yet.  Hey, if we're honest, none of us are perfect!!
IMG_4617
Love it!  It is such a bright and cheery room now, I know it’s just a bathroom, but it makes me happy!!!!

Monday, March 15, 2010

DIY Upholstered Headboard (Deployment Project #42)

Last week while you were all following Re-upholstery 101 and learning everything you need to know to re-upholster a simple chair, I was working on another project.  I am so excited to share this with you!!
I made an upholstered headboard.  This particular one was for a friend - - but it was the perfect trial run for me since I really want to make one for my bedroom - - (with a few added surprises!!)
DSC_0131 (1)
Here it is in all it’s beautiful glory!  In it’s new home in my friend master bedroom.  Notice the curtains – Yup (Deployment Projects #43 and #44)  And the cute striped pillows (#’s 45, and 46 - - - I count everything!)
So, here’s how I made it:
Supplies:  2 pieces of 1/4” chipboard (cut down to 80” long  - - -for a king size - - -  at the store)
3 yards thick batting
3 yards fabric
2 piece furrowing strips (1x3 boards)
2 long picture hanging systems

Tools:  sewing machine, staple gun, jig saw

Ok, on to the fun part now!
First you need to decide on the shape of your headboard.  Since I knew that I was going to monogram  the center of the headboard, so I wanted to make a curvy shape that would highlight the monogram.
Next, I took a piece of paper 80” long and folded it in half width-wise.
IMG_4422
Then I drew out half the shape that I wanted, and cut it out. - -This will be my pattern for the top of my headboard.
 IMG_4428
Next, I clamped my two pieces of chipboard together so that I could cut them at the same time.
IMG_4425
I measured on each end of my pattern to make sure that it was even and straight, then copied the pattern onto my wood with a sharpie.

IMG_4427
Time for the power tools!!  With my boards clamped together, I cut both pieces at the same time with my jigsaw following the lines that I just transferred.IMG_4429
If you don’t care about thickness, you could just do one piece of wood, but I really wanted the headboard to have some depth to it - - not just be a quarter inch thick - - I think it gives it a richer quality.  And at only $8 for a second piece of wood, I think it was worth the investment!
IMG_4430
To give the headboard thickness, I cut the furrowing strips so that they made an '”H” inside the headboard.IMG_4431
I nailed the boards in place, then made a chipboard sandwich with the other piece – nailing it in place.
Now it’s time to move this beast!  And I do mean BEAST!!  It is heavy!
IMG_4432
At this point, I attached the hanging system.  If you haven’t seen these before, they are fantastic!  It is a long strip that you attach to the back of your picture, or in this case headboard - - whatever it is that you are hanging.  Do you see the little lip that is hanging out - - this will slide onto the accompanying piece that attaches to the wall, except this time the lip will be on the top.  The best part about this system, is that it doesn’t have to be perfect.  Just level.  It even has a little channel that the included level snaps into!  Because the headboard is so big and heavy, I used two sets, making sure that they were both attached at the same height.
IMG_4434 IMG_4435IMG_4436
Next, it is time for the batting - - this just gives the headboard a softness - - especially around the edges.
IMG_4438 IMG_4439
I laid it over the headboard and stapled it on the back side, then trimmed all the edges.  Around the curved top, I cut a few slits to allow it to bend around the curve more easily.
 IMG_4433
Next, I laid out the black fabric on top so I could mark the placement of the monogram.  I used a soft chalk to mark each of the rectangles.
IMG_4441
Then it was time to embroider the monogram.
IMG_4443 
After the monogram was finished, I set the black fabric back on the padded headboard making sure that the monogram was exactly where I wanted it to be on the finished headboard.  Then I marked the entire outside edge with chalk.
 IMG_4442
This chalk line will be the line that I sew my white contrasting piping on.
IMG_4444
I made enough cording to go around my headboard twice.
I though I had taken pictures of these next steps, but I think my camera ate them….or I erased them.  Let’s blame it on the camera!!  So, I’m going to do my best to describe the next couple of steps - - no worries though, it’s easy!
First, I took a 4” piece of the black fabric the length of the perimeter of the headboard (ok, I just guesstimated, but you want enough to go all the way around the headboard!).  I attached the white piping to each side of the black fabric.  Try to follow along with my math here now.  The finished cording is 1” wide so with the rough edges matching up with the black fabric rough edge, you have 1”cording on the left, 2” of black fabric in the center, and then 1” cording on the right.
Then, I attached this long edge strip along the chalk line that I transferred earlier.
IMG_4475
Once this is sewn on, simply put the cover back on and staple the edges all around the back! 
Ta Da!
Your finished, that was easy wasn’t it?
   DSC_0133 (1)   
Ok, one last look because it’s so pretty!
DSC_0124 (1)DSC_0136 (1)
Did you notice the plates above the bed?  Fun aren’t they?  Guess what, they are paper plates!!!
DSC_0131 (1) 
Beautiful!

Thursday, March 11, 2010

Re-upholstery 101 - - - double cording tutorial - - - Day 4

reupholstery101

Day 1

Day 2

Day 3

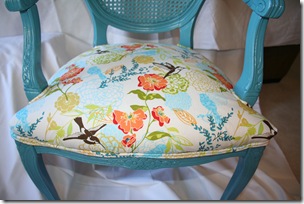
Welcome back!  It’s day four of Re-upholstery 101.  Are you seeing it?  Are you beginning to get a glimpse of what the chair is going to look like finished?  Fabulous isn’t it?!!!!

IMG_4541

Yesterday we got the seat fabric all fitted and stapled down.

Today we are going to finish our chair!

IMG_4498

Let’s go back to the arm cushions.  These are going to be covered exactly the same way as the seat cushion.  The biggest thing to remember is to center the same pattern on both cushions!

Take the two arm cushions that you took off and center them over the design that you want centered on your arm cushion.  Then cut out the oval shapes making sure to cut them larger than your pattern pieces.

IMG_4506

Go ahead and place your piece over the arm cushion - - again making sure you center your design both vertically and horizontally.
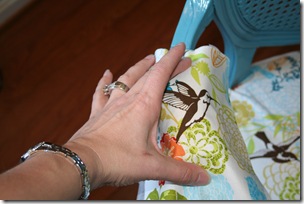
 IMG_4545

Take your staple gun and staple the sides of your fabric down.  Make sure that the fabric is smooth over the top and still straight.
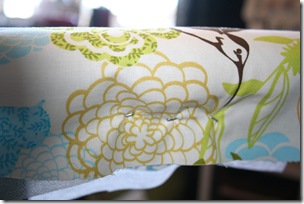
 IMG_4546

To do the top of the arm cushions, you will make little tucks and folds fitting the fabric around the shape of the cushion.

IMG_4547

Then staple these edges down.  Sometimes you can only do one fold, staple it, and then do the next fold.  This sounds a little complicated, but it is actually very forgiving, so don’t be afraid of it.  Remember, we will be going back and covering up all the staples.
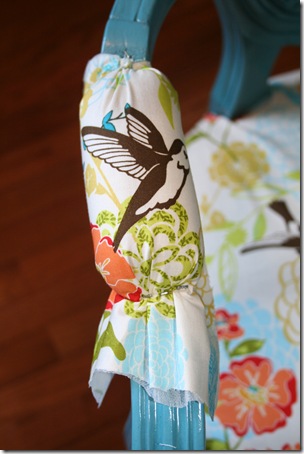
IMG_4548 

Next, you are going to go back with your scissors and trim close to the staples all the way around - - just like you did with the seat cushion.
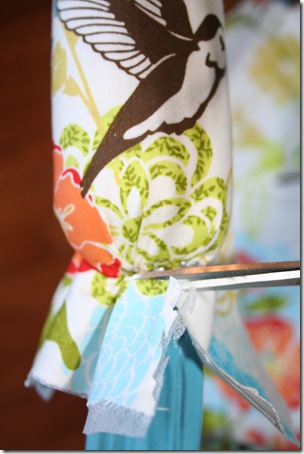
  IMG_4549

Now, you can really see what your finished chair is going to look like.  We are almost done - - all we have left now is to cover up all those staples!
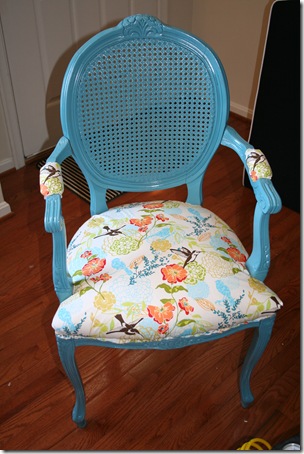
IMG_4550

It’s looking good, but the edges are really messy!!
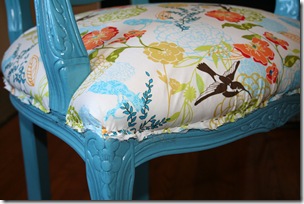
IMG_4544

Remember all that cording that we pulled off on the first day?  This is your no-sew option.  You can buy a coordinating braided cording and use that instead of making your own cording.  Just measure the cording you took off and buy the same amount (plus a little more just to be on the safe side!)
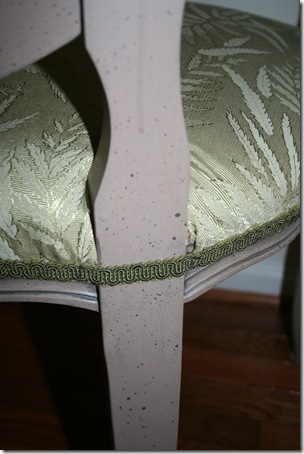
IMG_4490

Remember how I said I would point out things that were not done correctly on this chair?  Here is one of the big areas.  The cording that you put on, will wrap around the legs and arms to cover up the gap between the fabric and the frame.  It should not go over the leg as it does in the picture above.


Making Your Own Double Welted Self-Cording

This may look involved or complicated, but really it is quite easy - - I will attempt to explain it as easily as possible!

1.  cut 2” strips of your fabricIMG_4552

Cut enough to equal the length of the cording you took off -  plus a bit extra.

 IMG_4551

This foot for your sewing machine is a life saver.  It is a double welting foot.  You may have to search a bit for one - - but without it, I’m not sure if/how it would be possible to make double welting.  This is the bottom side of the foot.  You can see that it has two channels for the cording to slide through.  The needle will hit perfectly in the center of the two pieces of cording.
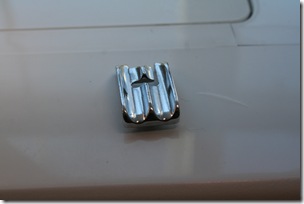
 IMG_4554

2.  Measure out two pieces of cording the length of the cording you took off.
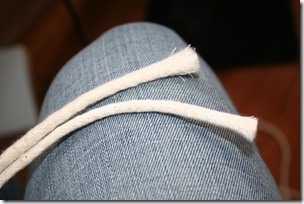
IMG_4553

3.  Take your first piece of cording and set it about 3/4” in on the left side of your fabric – on the wrong side of the fabric.  Wrap the fabric around the cording - -you should have about 1/4” of fabric laying past the cording.
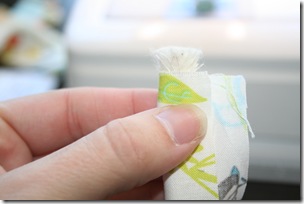
IMG_4555

4.  Place your second piece of cording snugly against your first piece, on top of the overlapping fabric.

IMG_4556

5.  Wrap the remainder of your fabric around the exposed cord.

 IMG_4557

6.  Flip the entire piece over and set it under your double welting foot, making sure the pieces of cording are in the channels.

IMG_4558

7.  Start sewing and continue wrapping as you go.  I can usually do about 6”-8” at a time and then I have to wrap the next section.  It takes awhile, but it is well worth the effort!
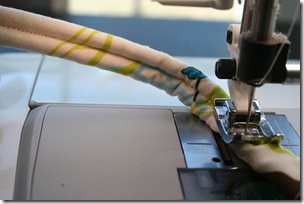
IMG_4559

8.  Trim the excess fabric off the back of your sewn cording.  You don’t want this hanging out when you put it on your piece.  I’ve found that working with a piece that is larger is much easier than trying to fit it perfectly the first time.

 IMG_4560


Alright!  Now that you have all your cording made it’s time to finish your chair!  Pull out your hot glue gun and plug it in.  Make sure you have extra glue sticks easily accessible because you don’t want to have to go searching for them once you get started!
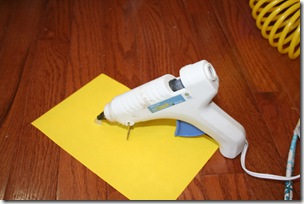
IMG_4561

Cut a clean edge on your cording - - this will be your starting point.

 IMG_4564

Choose a starting point that isn’t too close to the front - - a place where you can hide your seam.  Put some hot glue on your piece of cording and start placing the cording right along the edge of your fabric covering up your staples.

 IMG_4563

You are going to go completely around the seat of your chair – wrapping up and around the leg and arm supports.  Make sure you use plenty of glue and tuck the cording tight to the fabric and the frame.

IMG_4565

Once you make it all the way around your chair, back to your starting point, cut a clean edge again so that your finished edge will tuck right next to your starting point.

IMG_4566

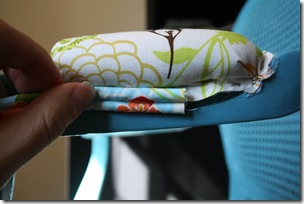
That was easy – huh?  Now all we have left is to do the same thing to the arm cushions.  Start under the arm cushion – wrapping and gluing as you go around and once you get back to the starting point, make a clean cut so that the two edges but evenly and neatly together.
 IMG_4567

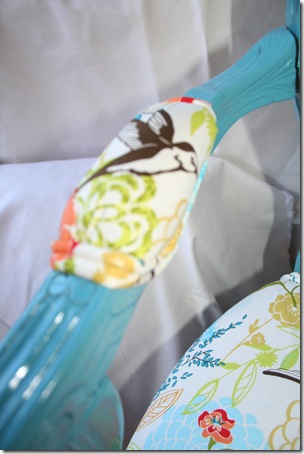
Notice how the cording finishes the chair?  It gives it a very custom look.
 

IMG_4571 IMG_4572 IMG_4574

 IMG_4573

Well, what do you think?  Not so scary is it?

IMG_4569

Have you gained enough confidence to give it a try yourself?

IMG_4575

Now I just have one problem - - -where to put this fantastically cute chair!!!  I love it so much, but I have not found a home for it yet in my house - - I know what Handsome Hubby is going to say….”sell it!”  We’ll see! 

I’ve tried to answer all your questions as you have left them, but if I missed one, please ask again!  I’ve had a ton of fun doing this.  I have some more complicated chairs that are just dying for a re-upholstery makeover.  Maybe I will do them and have a Re-upholstery 201 week!!

Related Posts with Thumbnails