Wednesday, September 8, 2010

Baby Quilt (Deployment Project #192)

Ten days till Handsome Hubby leaves country and 8 projects away from 200!  Will I reach 200 before he gets home?  If I didn’t have anything else to do but projects, I could definitely do it, but with everything that I need to do, I’m not sure if I will make it!  This homeschooling is kicking my patootie!!  I guess as kids get older, their schoolwork gets more difficult!  Go  figure! 

Here is a project that I was working on two weeks ago.  I couldn’t post it right away because I didn’t want to ruin the surprise!!

Our good friends Chad and Elizabeth are expecting their first baby in October.  We were all stationed in California together.  They are still there, and of course, we are on the other side of the country.  So, when I  heard that our friends in California were throwing her a baby shower,  I knew exactly what I wanted to do!

DSC04748

This quilt is made using  the techniques found in the book:  One Block Wonders

IMG_5898

Basically it is a lot of fussy cutting of one fabric into tons of triangles…

  IMG_5899

And then putting those together for form hexagons…

DSC04748

Then putting all those hexagons together to make the quilt!

 DSC04752

These are my favorite quilts to make because you really only have to choose one fabric.  All your blocks are made out of the same fabric.  See the pink paisley fabric below?  That is what all the hexagons are made from.  The green fabric is the backing and the polk-a-dot fabric is what I used for the binding.  Another plus about these quilts is that they look really involved and detailed, but they are really easy to make!!  I made this quilt in two afternoons!

 IMG_5896

DSC04749  DSC04750 DSC04751  DSC04752

Congratulations Chad and Elizabeth!  We can’t wait to meet your little one - - I know you guys are going to be awesome parents!!!

Sunday, September 5, 2010

Pottery Barn Inspired Savannah Slipcover (Deployment Projects #190-191)

IMG_5974

I am super excited to share this next project with you!  When my friend, Shana, brought me this picture that she ripped out of her PB catalog and told me she wanted this look for her chair and a half, I was eager to take on the challenge!
Here is a picture of her chair before:
IMG_5941
The PB inspiration picture:
IMG_5943
The final product!
IMG_5968
If you look closely, you will see that I changed out the pillow back and made a fitted cushion back.  It completely changes and look and comfort of the chair!
IMG_5969
Pleats!!!  I am so in love with these pleats!  Now I want to re-do all my slip covered pieces and add these pleats to the bottom.
IMG_5970 IMG_5972 IMG_5973 IMG_5974
I’m working on writing up a slipcover tutorial for this chair, but be patient.  Tutorials are long and involved!  They take forever to write!!

Wanna see some more fabulous slip-covers?  Head on over to Pink and Polkadot for the Slipcover Party!!


Wednesday, September 1, 2010

A Special Thank you gift (Deployment Project #189)

When Handsome Hubby was home on his two weeks of R&R, we took a little vacation down to southern Virginia to our friends family farm.  We had a fabulous time!  Mamie and Pop Pop were the best hosts!  One of the best things about going there was that Handsome Hubby and I had a place all to ourselves.  The kids stayed in the house with the rest of the family and Handsome Hubby and I stayed in the chalet.  IMG_5879

Mamie and Pop Pop

Mamie and Pop Pop took an old corn-crib and completely re-did it making it into the perfect vacation chalet.  It had a large living room with tons of windows to enjoy the mountain views, a bedroom, full kitchen and full bathroom.  Absolutely everything that one could need or want.

  IMG_5858

You wouldn’t guess that it used to be a corn crib!

We had such a great time there and appreciated so much everything that they had done for us.  Mamie did  not let me lift a finger while I was there.  She (and the rest of the family) made all the meals and did all the clean-up.  They just really wanted our family to have a time and place that we could relax and reconnect.

  IMG_5859

I really wanted to let them know how much we appreciated everything, so I came up with a little “thank you” gift for them.  I made this custom embroidered pillow for them with a picture of the chalet on the front. 

DSCN4524     DSCN4527


I sketched a picture of the chalet, scanned it into my computer, then ran it through my embroidery program and had it converted into an embroidery, which I then embroidered on to a linen fabric.  I then made that into a pillow.  I absolutely love how it turned out and by the “Thank you” card I got from Mamie and Pop Pop, so did they!!

scan0002 DSCN4525

Thanks again for a wonderful time!!!

In other exciting news, Handsome Hubby has informed me that in less than 20 days he will be headed back home!!!!  That means that by the end of this month, he will be home for good!!!!  I’m sooooooo excited!  We have been waiting for this day for a long time!  I still have quite a few deployment projects that I want to finish up, but at this point in time, if I don’t finish them, I don’t even care!!  I’m just so ready to have him home!

Thursday, August 26, 2010

Master Bedroom Final Reveal (Deployment Projects #180-188)

Let me start off by saying that I am going to do what every good blogger would tell me not to do.  I am going to cram a zillion projects and pictures into one post.  The reason?  We started school today.  OVERWHELMED would be an understatement for me right now!  I realized today just how much Handsome Hubby balances me.  When I am having a bad day or I am overwhelmed, he can always balance me out and bring me back to sanity!

I realized today that the older my kids get, the harder their school gets, and the more time and focus it is going to require from me.  So, in an effort to be able to focus on my kids and their education - - instead of dragging this reveal out over a time span, you get it all today.  So that tomorrow when I am trying to teach, I don’t have a blog post trying to compose itself in my head!!  This also means that posts may be fewer and farther between, at least until we can figure out our new “normal.”

So, with that in mind, here is the final product!!  There is still some work to be done, obviously I still need some stuff to put on the walls, but I don’t want to hang something there just because it is what I have, I want to put things that I love on the walls, so in the meantime, they are going to remain blank!

Before
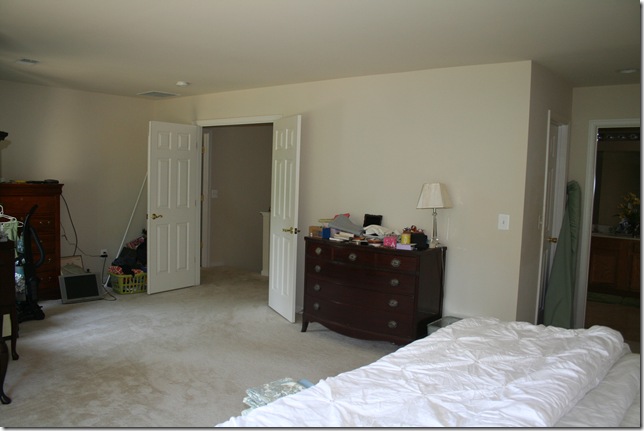
IMG_5266

After

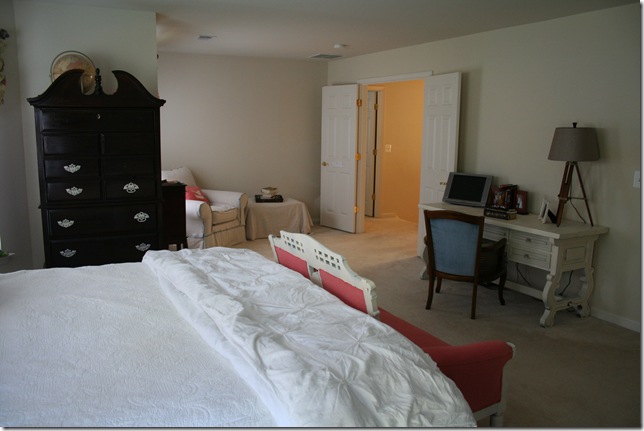
IMG_5911

Before

IMG_5265

After

IMG_5924 IMG_5936

Before

IMG_5264

After

IMG_5935

Before

IMG_5267

After

IMG_5918

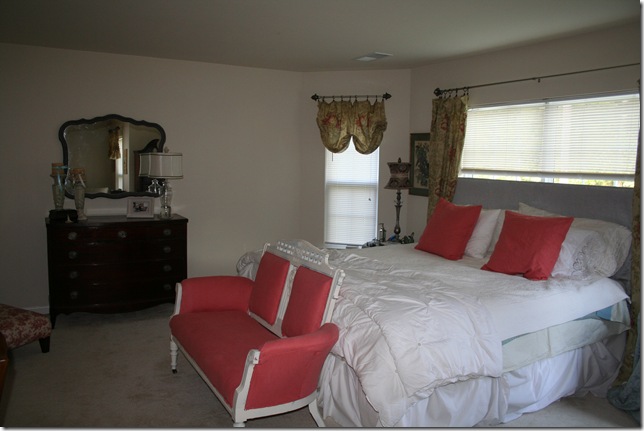
As you can see, I have completely rearranged the room.  Moving the bed in front of the window did three things:  it finally gave me a place where the bed could be centered (all the other walls make the bed not centered on another area - - it just was not working for me), it helped make the room seem a little bit smaller compared to looking in through the doorway and seeing the long bed way on the other end, and lastly, it put it under the air vents in the ceiling so that we actually get some air at night instead of roasting!! 

I was apprehensive of covering up the window, but with the two side windows, we still get plenty of natural sunlight and as a bonus, at night I can open the blind behind the bed and get a great view of the moon and stars!

IMG_5938

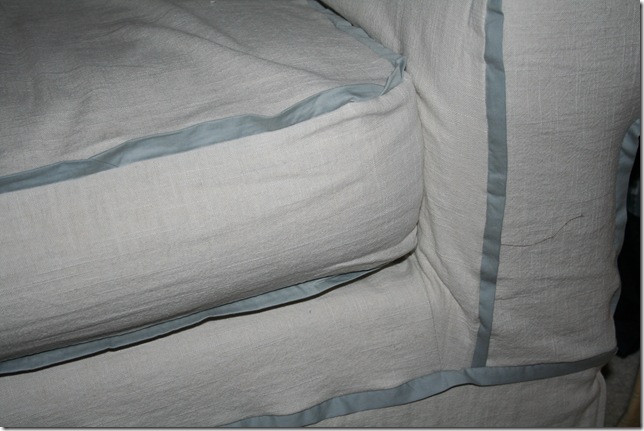
One of the projects for this room was slip-covering this chair.  I used the same method that I used for my dining room chair slipcovers, except that as I sewed the seams, I put a flat flange edging in the seam.  You can find my tutorial on flat flange here.  The chair was a fantastic Craigslist find - - chair and ottoman for $60.  They were in great condition and super lightweight (always a plus when you move often and have weight restrictions!).  The only thing wrong with it was that it is a yellow plaid, not the look I was going for in here, so it was the perfect candidate for a slipcover.
IMG_5903

I wanted to bring some of the coral over to this side of the room, so I embroidered one of my birds onto the coral fabric and made it into a pillow.

IMG_5939

This chaise was on etsy also - - except that it was a friend/client of mine who had it listed, so I traded pillows and cushions for it.  It is my new favorite spot to lounge and read in my room!!  I know the walls are still blank in that corner, but I am looking for the perfect lamp to go next to the chaise and I don’t know what I want for the walls yet!!  :)

IMG_5912

Next it was time for window treatments.  I love this fabric.  It is a vintage looking floral linen.  If I had enough of this fabric I would have lined the walls with it!!  It has the French blue in it that I have throughout my house along with the pop of coral and pink.  Not enough coral and pink to make my husband hate it, just enough to give the room an unexpected pop of color!  I made really simple balloon shades using shirring tape on the edges.  The centers are just pinned so that when we move, I can adjust everything if the windows are a different size.  On either side of the bed, I just hung the fabric in long panels to soften the edge between the headboard and the window frame.

IMG_5906 

IMG_5908

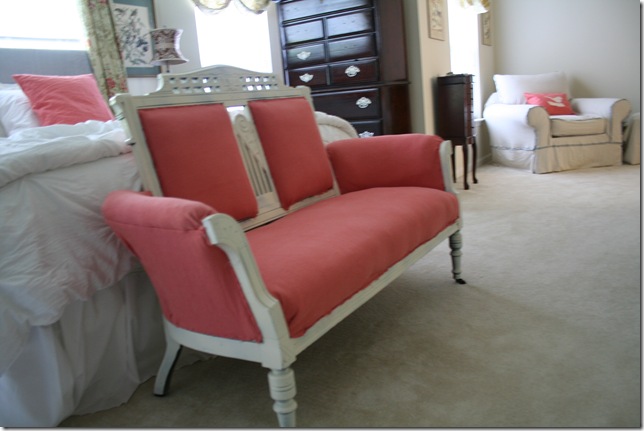
This little settee was another craigslist find:  $75.  I absolutely love it!  When I first started working on the room, I re-upholstered this in a blue/green velvet.  It looked really pretty, until I put it in the room.  Then I hated it.  Every time I would start working on the room, I knew that something was wrong, but I just couldn’t put my finger on what it was.  Then one day, I was playing around with my fabrics to go on my bed, when I set a piece of coral fabric on the settee.  Suddenly I knew what was wrong - - the blue/green was not working in that room.  I grabbed Cameron and together he and I ripped off the fabric and had the settee re-upholstered in 45 minutes flat (including ripping the old off!)!!  Obviously it is an easily done piece.  It uses the same techniques that I showed you in my re-upholstery 101 series.

IMG_5202 IMG_5924

I will admit that this project isn’t finished yet, I still have to put the double cording around all the edges.  I was really hoping to be able to buy a finished braiding that would match the coral - - but I have not been able to find anything that even remotely matches.

IMG_5922 IMG_5921

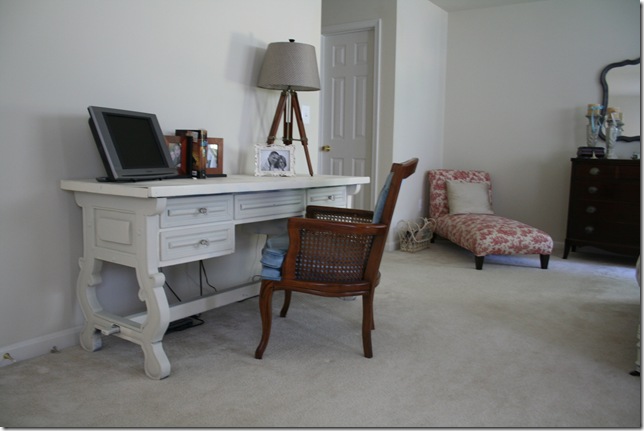
This desk was my old sewing table.  Needless to say, the top was very scratched up!  I love this desk, I got it at a garage sale in CA for $30.  I almost didn’t get it because I really wanted to talk them down to $20 (I’m cheap).  I am so glad that I did splurge and spend the extra $10.  Knowing how much I have used it and how sturdy it is, I would pay way more than that for it now!  After having a sewing machine, pins, and scissors all leaving their mark on the top of it for the past three years, it was in need of some TLC.  I decided to just give it a fresh coat of white paint and some new hardware. 

IMG_5310

Handsome Hubby has been asking for a place of his own where he can have his books and computer and be able to spread out without me telling him that I need more room to lay fabric out in his workspace!  This is the perfect place for him.  When he came home for R&R and I showed him that he had this spot all to himself, he couldn’t have been happier.  Now, when he comes home for good and goes back to school to finish up those last 3 classes he needs for his Masters, he will have the perfect study spot just waiting for him!

IMG_5911

Well, that is my Master bedroom in all it’s glory.  Yes, it still has some gaps to fill in, but it much better than it was before.  It works for me now.  It kind of feels like a hotel room, with plenty of comfy seating, a desk to work at, and a big inviting bed!  It is now one of my favorite rooms in the house!!

Tuesday, August 24, 2010

Master Bedroom Day 1

Wow!  Your comments on yesterday's post really made my day. You all are so sweet. It is so nice to know that there are others out there who appreciate and acknowledge the sacrifice the entire military family makes. It won't be long before handsome hubby is home for good and we cannot wait! I'm sure you can’t either, you're probably sick of hearing me talk about deployments and deployment projects!

Have patience with me this week as I try to balance Handsome Hubby going back, coming off of a weeks vacation at the beach, customers orders that have been put aside for three weeks, and of course, our home school starting on Thursday.  We are excited to start our new school year, but I should could have used a couple more weeks of summer!  Who am I kidding, if I were to have two more weeks of summer, I would still be saying I wasn’t ready for the school year to start!!

Well, as promised, this week I am going to show you the finished master bedroom. For today I am going to show you the before pictures and also a few sneak peeks at the fabrics and some of the details in the finished room.

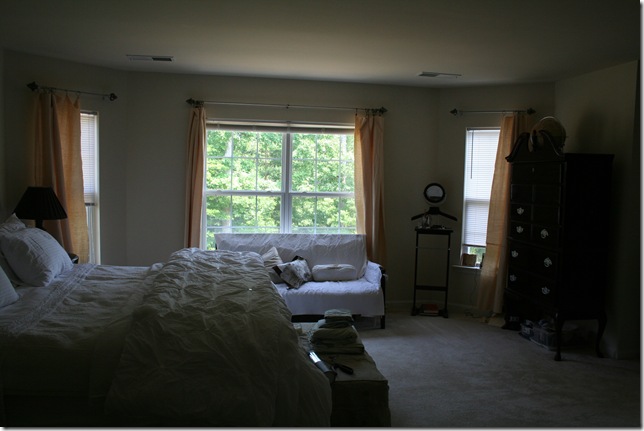
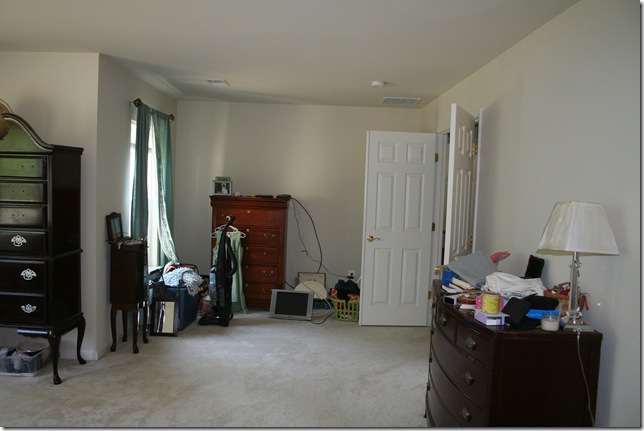
This room is huge! We have never in our married life had a room so big.  Honestly, it has taken me so long to do this room because I don't know what to do with all the space! Here is how it was laid out before.

IMG_5265

Do you see how much room there  is in here?IMG_5266

Overwhelmingly huge!IMG_5264

There  is no real good way to lay the room out.  Notice,this one whole corner just turned into a storage area for all things that didn't have a home.I finally got sick of it all,and when my friend Kristi came to visit,we completely rearranged the room.Tomorrow I will show you the new layout we came up with.

IMG_5267

Re-doing the room involved lots of projects!  Re-finishing an old desk (actually my old sewing table).

IMG_5311

Adding new hardware.

IMG_5902

Making a couple slipcovers.

IMG_5903

All new fabrics for the windows and bed.IMG_5901

And of course a re-upholstery project.  IMG_5203Have I peaked your interest now?  Tomorrow I will show you the actual projects and take my Deployment Project count close to #200!  I cannot believe how many projects I have gotten done while Handsome Hubby has been gone!!

Related Posts with Thumbnails