Thought I would give you a quick little update. Quite a few of you sweet readers have asked me how I have been feeling. So, here's a quick update for you.
At the end of July I was finally able to get in the neurosurgeon. My appointment was at 9:00 Monday morning. By 9:30 they had already determined that surgery was our only option. By Monday afternoon, I was doing my pre-op appointment already. Wednesday I had to go back for the rest of my pre-op appointments. And, on Friday morning we were back at the hospital bright and early for my surgery.
I had a disk replacement between vertebra 4 and 5, and a bone fusion between vertebra 5 and 6 (in my neck). By Saturday morning, they were sending me home. Things were fine for the first 12 hours but by Sunday at noon, Handsome Hubby was packing me back into the car and speeding through DC traffic to get me to the Emergency room. I was admitted back into the hospital and ended up in ICU for 3 days. Five days later I was finally released to go home again!
Funny thing about being in the hospital...if you recall, we are military, so I had my surgery at Walter Reed Army Medical Center in DC. While I was in there (for the second time), I was able to look out my window and see the closing ceremony taking place. (yup...WRAMC officially closed while I was a patient in it - - it's kinda weird - - it turned into a ghost town, but I had fantastic care since the floor I was on was supposed to have around 60 patients and there were only 3 of us on that floor!)
Once I got home, I was basically stuck in the lazy-boy. I was very limited in what I was allowed to do and thankfully Handsome Hubby's aunt and uncle came to help us out. Just a week and a half later, we were all boarding a plane headed to Jamaica. We had bought our tickets for Jamaica in February so there was no way we were missing our family vacation! Everyone had a great time there - - although I do have to admit that I don't remember much of it since I was still on a lot of very good meds!
So, where does that leave me now? Better! I have been feeling fantastic! The pain is completely gone and the Dr. says everything is healing very well. I have been released to resume things, within reason and with limitations. It takes me a lot longer to get things done. I've found I can't whip out projects as quickly as I was able to before, but at least I don't have the pain, I can enjoy my kids and Handsome Hubby again and I can be the wife and mom that I want to be!
I am doing projects, but obviously I haven't posted anything. We have really been consumed with school since September. With a 5th and 3rd grader, it takes us much longer to cover everything and I am trying to keep my focus on them first, and projects second. So, if you see a lack of project posting, that's why....priorities. I'm working hard to make sure that my Handsome Hubby and kiddos come first!
Well, that's my update in a nutshell. I will be posting things as I find time, but not on any consistent basis. Thank you for all the support and concern you have all communicated to me!! :)
I'm feeling great and loving it!!
Tuesday, November 1, 2011
An Update
Posted by Amy {Design Intervention} at 6:05 PM 40 comments
Wednesday, June 15, 2011
No... I didn't fall off the end of the earth!
Posted by Amy {Design Intervention} at 6:41 AM 29 comments
Tuesday, March 8, 2011
I’m Guest Posting on CSI!!!
Posted by Amy {Design Intervention} at 11:54 AM 7 comments
Tuesday, March 1, 2011
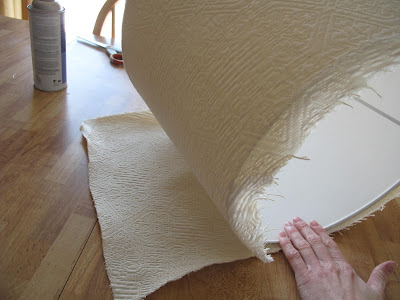
Removing Staples!
I get questions all the time about removing staples when re-upholstering.
What are the best tools?
Do I have to remove all the staples?
STAPLES - - - the bane of my existence!!! I hate those pesky staples too!! When I first started re-upholstering I thought I needed to get every one of those boogers out - - I have now come to the conclusion that unless they are sticking up - - they are not going to get in the way of my progress!! So no - - -don't worry about pulling them all out - - make sure you have a smooth surface to work with, but if that smooth surface happens to have 50 staples in it that are flush against the frame, I still don't worry about it.
I have found a great tool for removing staples - - at Harbor Freight they have a heavy duty staple remover that you just put under the edge of the staple then rock it back and the staple pops right out.
I love it!! And for $2.99 you can't go wrong!! (BTW - - - pick up a big magnet while you are there, then you can just pick up all your staples with the magnet and not ruin your vacuum or step on them!! It's my little trick!!) Often when i am removing staples, I will use that tool and loosen them all, then go along the entire side using my wire cutter pliers to pull them all out.


When taking off the old fabric, you are going to start by removing the dust cover on the bottom of the chair, then the skirt if your piece has one, followed by the back of your chair, the front of the chair, then the arms and finally the front of the back. Take pictures as you remove each piece, so you can refer back to them as you are putting your piece back together. When you are putting your new fabric on, you will do it in the opposite order that you took it off. So your first piece back on would be the front of the back, seat, arms etc. and finally finishing with the back of the chair and the dust cover.
Posted by Amy {Design Intervention} at 6:47 PM 12 comments
Monday, February 21, 2011
Guest Post!
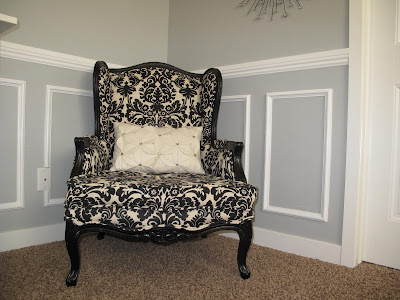
One of the best parts about having a blog is hearing from my “new friends” and seeing all the projects you have been inspired to tackle! I met “Little Miss Penny Wenny” (met is a loose term since we really have only met over email :) ) when she emailed me with some re-upholstery questions. When she finished her project and sent me pictures, I was blown away! She did a fantastic job!! PW just did a complete room makeover and she is guest posting today to share all the details with you! Look for the beautiful black and white chair in the pictures - -- she re-upholstered it all by herself!!! Wahoo!
**If you get the chance, please help her out by voting for her in the Ivory Homes Interior Design contest if you can! All you have to do is go to Ivory Homes Facebook page, "like" them, and then "like" my submission. Last day to vote is today!
I am thrilled to do a guest post here today. I feel honored to be amongst the pages of such talented bloggers and DIY-ers!
My very humble and oh-so-small blog, Little Miss Penny Wenny began late last year in attempt to share the joy with others in some of my favorite domestic and creative hobbies- furniture revival and re-upholstery, cooking, sewing, decorating, and thrifting. The transition for me from a fast paced professional career to a stay at home mom was a difficult one to say the least. Finding the joy in this chapter of my life has truly changed my perspective. I feel so blessed and happy to be where I am! My goal is to help others find that joy as well.
My hubbs and I recently tackled a huge project in remodeling our Master Bedroom. This space hadn't really been decorated at all since we built the house last year. I had slowly been collecting pieces that I wanted to refinish or decorate with for the space, when my friend informed me about an interior design contest that he suggested I enter into. Me? Interior Design??? HA! Having had no professional experience or training in my life on the subject I thought it was a laughing matter. However, I do love a challenge. So within about a week (and absolutely no sleep) our bedroom went from this:
to this:
Wanna know the best part? We did this entire bedroom remodel for $539 including chair rail and picture frame molding.
Here's an overview of what went down during our weekend of chaos fun:
We painted the walls a soft calming gray, in an accidental cross between Valspar's "Gravity" and "Silver Leaf" custom mixed by Home Depot in Behr Paint and Primer in One (try and say that five times fast...);
We installed chair rail and picture frame molding;
I painted and glazed these fabulous vintage Henredon night stands;
I painted these Better Homes lamps (on clearance at Wal-Mart) and recovered these thrifted lamp shades,
I (with the help of my amazing and patient mom) sewed these euro shams and standard shams to go along with my gorgeous gifted white coverlet and teal silk duvet, and Target toss pillow;
I sewed this Waverly cross section charcoal fabric into my existing white curtains to extend the height and add some pizazz;
I spray painted and cut to size a 1/2" electrical tube (10' long) from Home Depot for my curtain rod;
I replaced the pictures in these frames from Family Dollar with my own scrapbook paper (and removed the glass for a more vintage feel) and assembled them above our bed;
I painted and glazed the frame to my PoppySeed Salt Lake City Temple print, where my hubbs and I were married;
I hung my $10 Sunburst mirror from Family Dollar above the French Wingback Chair that I painted and reupholstered;
and added some vintage pieces to tie together my theme, including this gold picture frame (thrifted);
and this antique silver kettle (a family heirloom).
After all of that, we ended with this beautiful and tranquil space:
I finished this remodel with literally not one minute to spare just in time to enter it into the interior design contest. With a bit more time, I would have completed the following:
- hung a new light fixture (I would like a lantern for a unique feel)
- finished reupholstering the ottoman to my French Wingback Chair and staged it at the foot of our bed to serve as a bench and ottoman to the chair
- hung black and white prints in an eclectic assortment of vintage white frames on our longest wall
I will post pictures of the additions when the room is complete to my liking. Still, our submission was selected as one of the finalists, and 50% of our score is based on votes. So far we are doing really well! If you like what we did and would like to vote for us, please go to Ivory Homes Facebook page, "like" them, and then "like" my submission.
I am still so flattered to have been chosen as a finalist. I hope our crazy efforts will inspire others who don't have any formal experience to step out of their comfort zones and take a stab at remodeling and decorating. Trust me- if I can do it, so can you!
For more details and tutorials on how the pieces in this room were created, stop by my blog. Thank you so much for reading, and a special thanks to Amy for hosting me!
~ PW
Posted by Amy {Design Intervention} at 5:57 PM 25 comments
Thursday, February 10, 2011
A Christmas Blessing
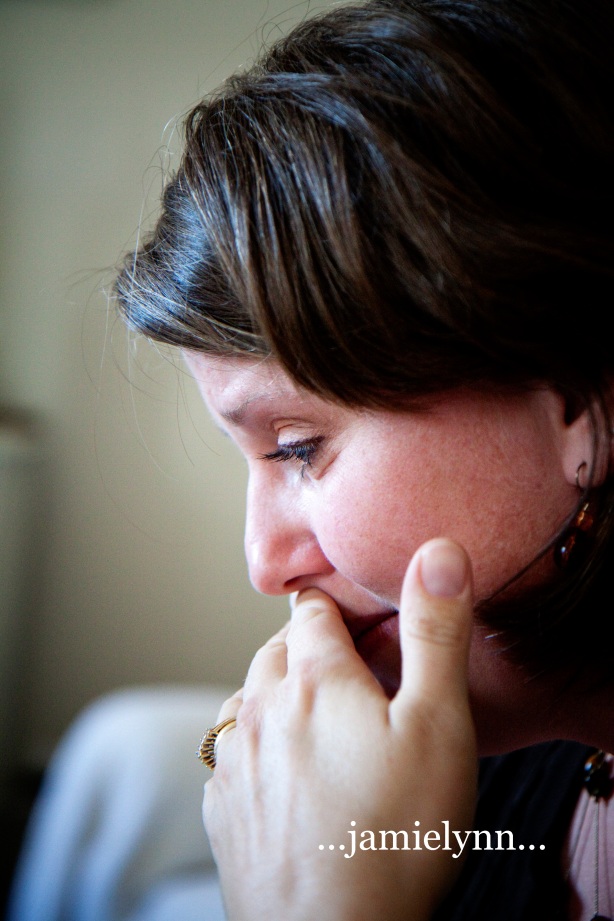
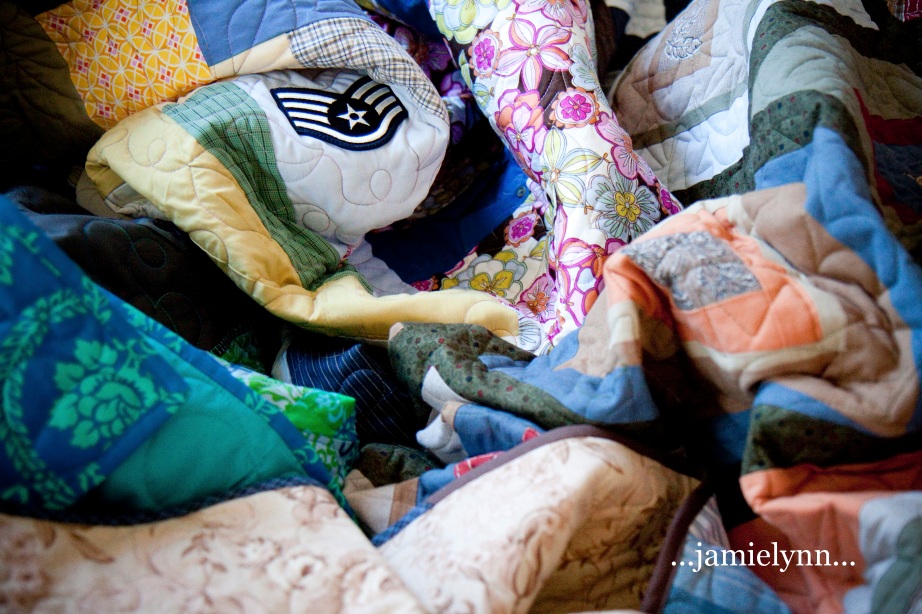
All Photos by Jamie Lynn Photography
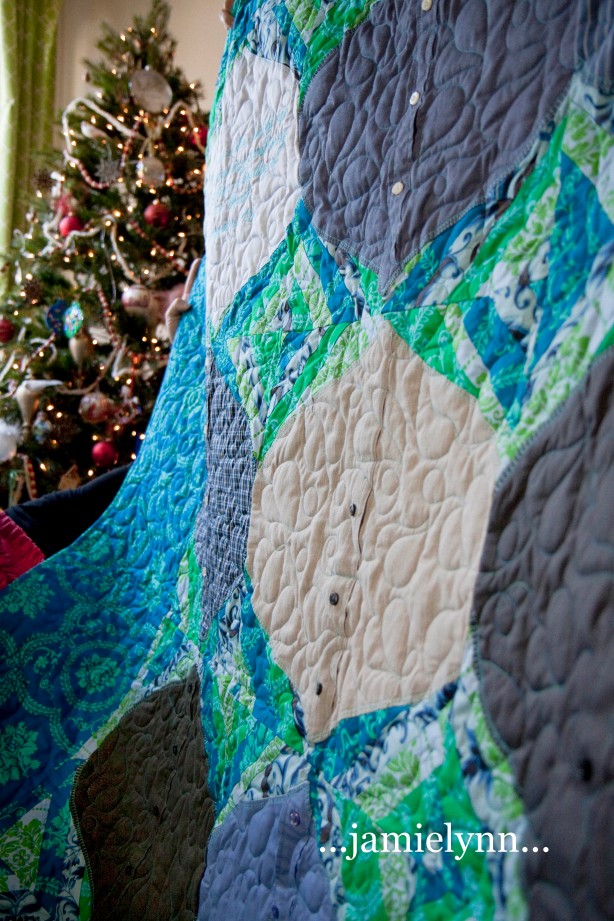
Remember months ago….while Handsome Hubby was still deployed…when I was still able to post lots and lots of projects? :) I gave you a sneak peek at a quilt I was working on. Many of you guessed that it was made from dress shirts, but that was all you could know about it at the time. I promised that after Christmas I would tell you the rest of the story and show you the finished project. So…. In my best Paul Harvey voice, “And here’s the rest of the story.”
As many of you know we’re a military family. I first met Melissa right after we moved here when I visited PWOC for the first time. She was sweet, inviting, encouraging, and honest. She told me, Bill, her husband, had just gotten diagnosed with lung cancer, not even a year after retirement. They were fighting it with every weapon they could find. I was amazed at her strength and courage. At her faith and trust in Jesus.
After we found a church here, I was delighted to find out that Bill and Melissa were in our same small group. We watched, encouraged and supported as well as we could, over the next year as their family dealt with his cancer. And when we learned that he was dying, we felt helpless. How could we comfort Melissa and her sweet children? Words do not come easy for me, I am a hands on person.
but…this story is not about me…
It’s about the Melissa and her sweet family. and their courage. and pain. and heartache.
as a close friend of hers wrote on her blog (and I couldn’t say it any better than this):
“this is a story of redemption. about jesus and all He is to this family. He is the one who has seen this family through bill’s cancer, his chemotherapy, his struggle to live, and, eventually, his freedom from this earthly battle. bill knows jesus. and so he’s living with him now. knowing that is huge…and yet…
this sweet, broken family now has to continue to live here…without bill. with a piece of them missing. they will have to wait to see their husband and dad again. and therein lies the struggle…
but i do know this. bill is waiting for them. and they want to be there, too…but they have to live here now.”
In August, a few months after Bill’s death, Melissa came to me and asked the sweetest request she could have ever asked. She asked me if I would use Bill’s shirts and make quilts for her girls from them. I was delighted! Finally, something hands on that I could do to bring joy and comfort. Melissa told me that she had a friend stationed in Germany who was making a quilt for her, and another friend making one for her son. I would be responsible for making quilts for both of her girls.
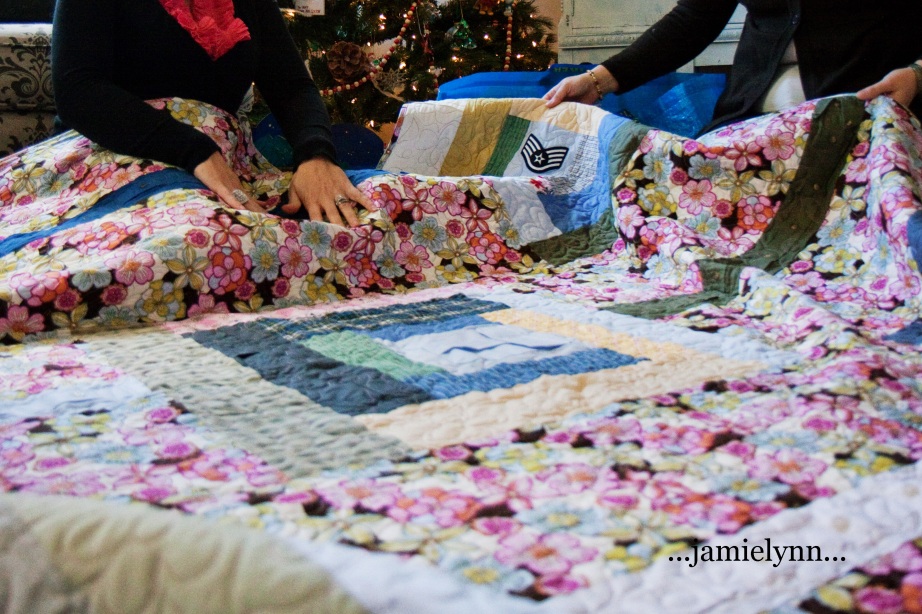
In December, right before Christmas, all of the ladies involved with making the quilts, along with close family friends gathered at my house so we could see the finished product and pray over them. We prayed that as Melissa and each of her children were wrapped up in their quilts, they would find comfort, warmth, and security… and really so much more that cannot even be put into words.
These quilts were a Christmas Eve surprise for her kids…to be able to sleep under these quilts and wake up cozy on Christmas morning…
Melissa’s friend, and very talented photographer, Jamie Lynn, was there to capture the beauty of the moment.
Katie pieced Will’s quilt…
Megan’s quilt…
Abby both pieced and quilted Melissa’s quilt…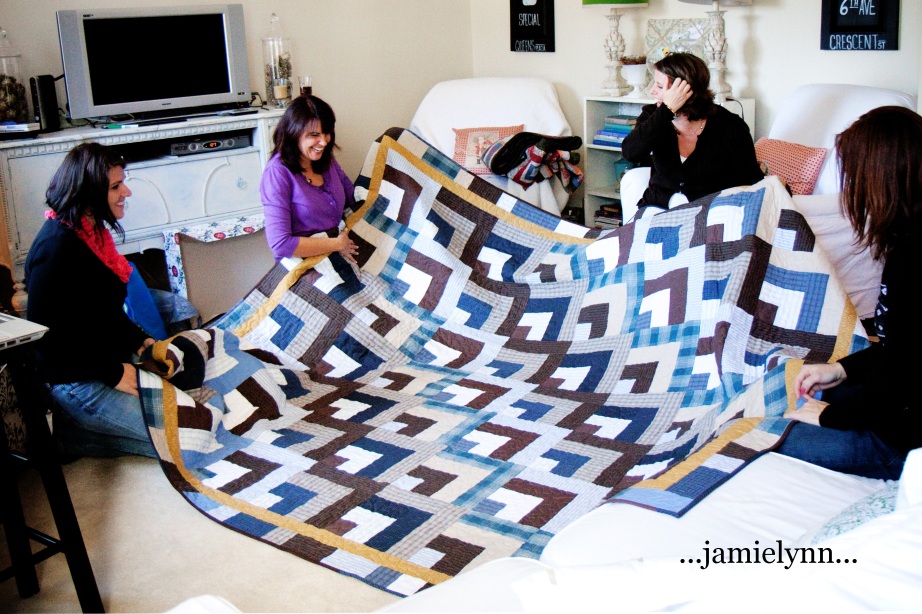
From Jamie Lynn's blog (her reaction to the afternoon - - again, put into words what my heart is feeling but I somehow am not able to put into words):
“this afternoon was absolutely incredible. revealing the quilts to these ladies that helped shape them. praying for each one that would use them…and then wrapping them up. aby dolinger is currently stationed in germany, so these quilts really did have to cross the ocean twice…what amazing work. i also wanted you to see the detail, not only in the material, but the quilting itself. go back and look closely. will’s quilt had stars, megan’s quilt had leaves and hearts stitched all over it, and lexi’s had leaves and flowers…i just couldn’t get over the detailing…
which got me thinking about how our God also cares about the details in our lives, that He cares that there would be something tangible for mel and her kids to hold on to that belonged to bill…it’s just so amazing to me that it matters to Him…
amy, katie, and aby…thank you for using your gifts freely, for giving generously. you’ll never know the depths to which these quilts speak…i’m not really sure any of us will…you’ve been a true encouragement to my heart…
melissa, will, megan, and lexi…as you wrap up in these quilts, may they be a constant reminder of the love your dad and husband had for you. he will always be with you. i’m so proud of you all…continue to run with perseverance the race marked out for you…always pressing forward. i’m truly honored to call you friends…and thankful for the gift you’ve given me in capturing these moments…”
Posted by Amy {Design Intervention} at 6:11 AM 26 comments


