Sunday, June 27, 2010

Guest Room Re-do (Deployment Projects #148-153)

So…. How was your weekend?  Mine?  So glad you asked!  It was CRAZY!!!!  Not crazy like we were running all around town to this and that - - nope, never even left the house the entire weekend except to go to church this morning.  Not crazy like my kids were driving me nuts and I was inches away from disowning them - - nope, they got along great this weekend!

NOPE, it was CRAZY exciting!  Now, granted, not as exciting as it will be when my beloved comes home, but exciting none the less!   It started Friday night when I decided that our guestroom needed a make-over.  I’m like that, I get random ideas, and then just act on them – sometimes not even thinking the whole idea through before hand.  For example, I probably should have thought ahead to the fact that I am still in the middle of re-doing my kids rooms.  Yes, that would be two rooms completely in upheaval and I decided to add a third room to the mess!

Of course, it was also exciting on Saturday morning when I got up and checked email and had blog comments galore!  I had to go and see what this was all about.  Nester - - - that’s what it was all about!!!  I jumped over to her site and what was greeting me?  A picture of me and my beautiful children!  I was on her Saturday Bird Watching!  How exciting - - and welcome to all my new followers!!!!

 image

So, after I got over my huge shock from Nesting Place and came back down from cloud 9, it was back to the guestroom re-do.

It was such a random idea, that I didn’t even stop to take before pictures - - -which is a real shame now because it would be so much fun to show you the before pictures at this point!  But, I guess if I was going to be completely honest it wasn’t decorated before….at all.  I had hung curtains (but they had fallen out of the wall three times   - lack of anchors and kids playing hide and seek in them will do that!) so there were no curtains any more and I had just thrown and orange quilt on the bed.  There was a Mickey Mouse TV gracing the dresser and all the furniture was in the wrong place making the room feel even smaller than it is.

So I got the gumption and just started moving furniture around (with the help of my very strong 9 year old!), got rid of the old curtain rods that wouldn’t stay in the wall anyway, added anchors and hung new curtains, made some pillows for the bed, shopped the house for accessories, made some art for the wall and improvised where needed!

I decided that I wasn’t going to leave the house to do this room.  I decided everything needed to come from the house - - re-use, re-purpose, borrowed from another room or taken from my stash.

So, without any before shots to share with you, here are the after!

IMG_5486

I started by moving the bed in front of the window.  Originally it was coming out from the wall where the beach sign is.  It made the room so tight, you could barely walk through the room.  So much roomier now!


IMG_5485

Next, I changed out the bedding.  I went all white.   I have  a long standing policy with Hubby - - if the hotel doesn’t have white bedding, I’m not staying there.  It just makes me feel like the room is clean and fresh.  So I did the same for our guest room.

IMG_5480

Next I hung up some new curtains.  I used rotating cafe rods.  Two reasons I went with these:  1.  these windows are super wide and getting a rod that is long enough requires taking out a loan and 2.  I happened to have these rods on hand!  I had bought them on clearance years ago knowing that I would need them “one day.” 

 IMG_5484

I also squeezed in a small corner cabinet next to the bed, making sure the clock is visible from the bed and that you can turn the lamp off from the bed.  It is a stretch, but there is nothing worse than being in a house you don’t know and you have to walk from the light switch to the bed in complete darkness!

IMG_5487

I was able to fit in a small antique dresser, the perfect place to store the guest towels, sheets and extra blankets.  I like to put dryer sheets in the drawers to keep everything smelling fresh!   I also had room to put a small reading chair in the corner with a floor lamp.  The chair is from my Grandma.  I was originally going to re-do the chair.  Painting it and re-upholstering it, but it is in fabulous condition and it has so much sentimental value to me, I just couldn’t do it.  Now that I have it in this room and the color works perfectly, I am so glad I didn’t touch the chair!!

IMG_5480

Speaking of sentimental things - - the bed was our wedding gift from Handsome Hubby’s parents.  Would it give it a more beachy, cottage feel if I painted it white?  Yes, but again, sometimes the sentimental side wins! 

Well, now that I have shown you the complete “after” pictures, you will have to come back tomorrow to see some of the projects I did for this room.  I’m so excited about them, here are some sneak peeks!

IMG_5483


IMG_5477  

   IMG_5478

Tuesday, June 22, 2010

I’m a Winner!!!

Ok - - I so should be doing something else - - like dishes, or laundry, or cleaning , or teaching, or sewing or or or…….

But, I’m so excited!  I just won the most beautiful necklace from the blog Thirty-six Ten!!test3

It’s a Vintage Mother of Pearl Button in Sterling Silver Necklace.  Isn’t it beautiful?  And so fitting for me - - I love my vintage button collection,  and almost all my pillows are made using vintage buttons for the button back closures.  Perfect!

If you think this is beautiful, you should check out her etsy shop….

Rose Quartz Sterling Silver Ring

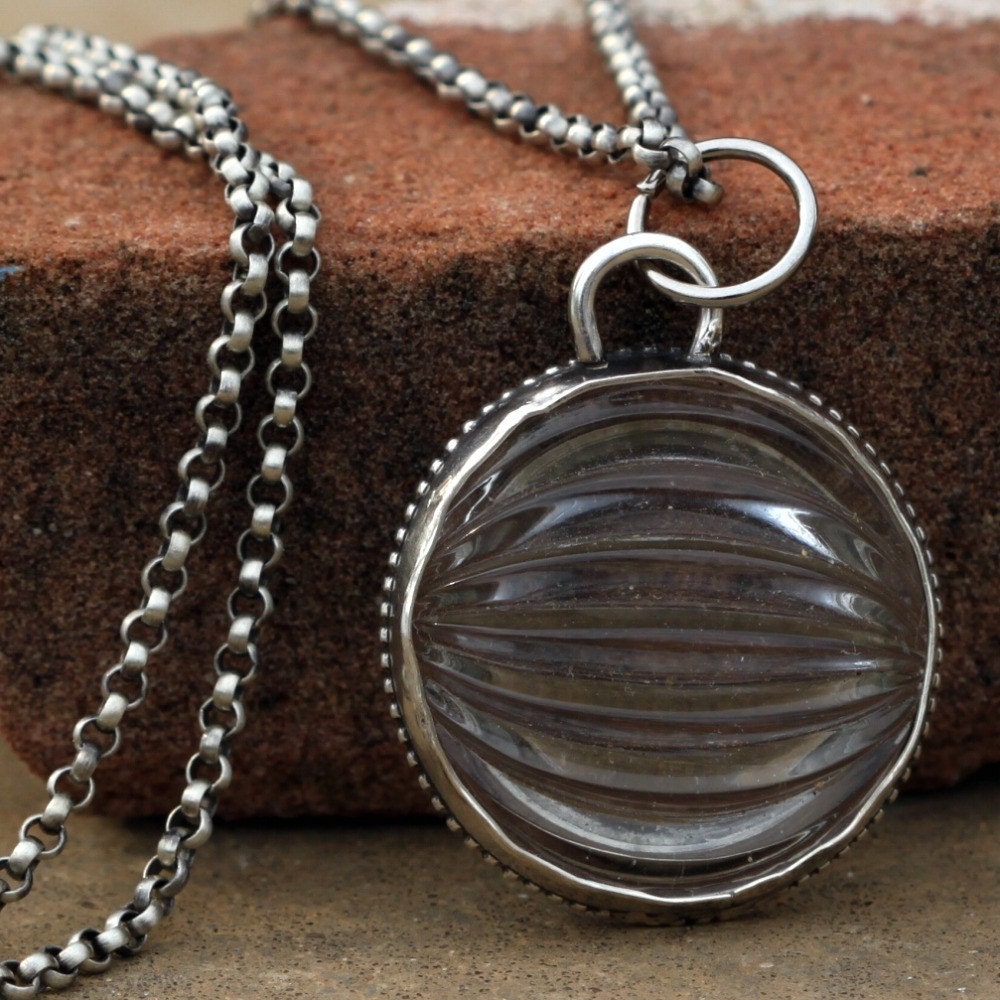
Nautical Glass and Sterling Silver Necklace


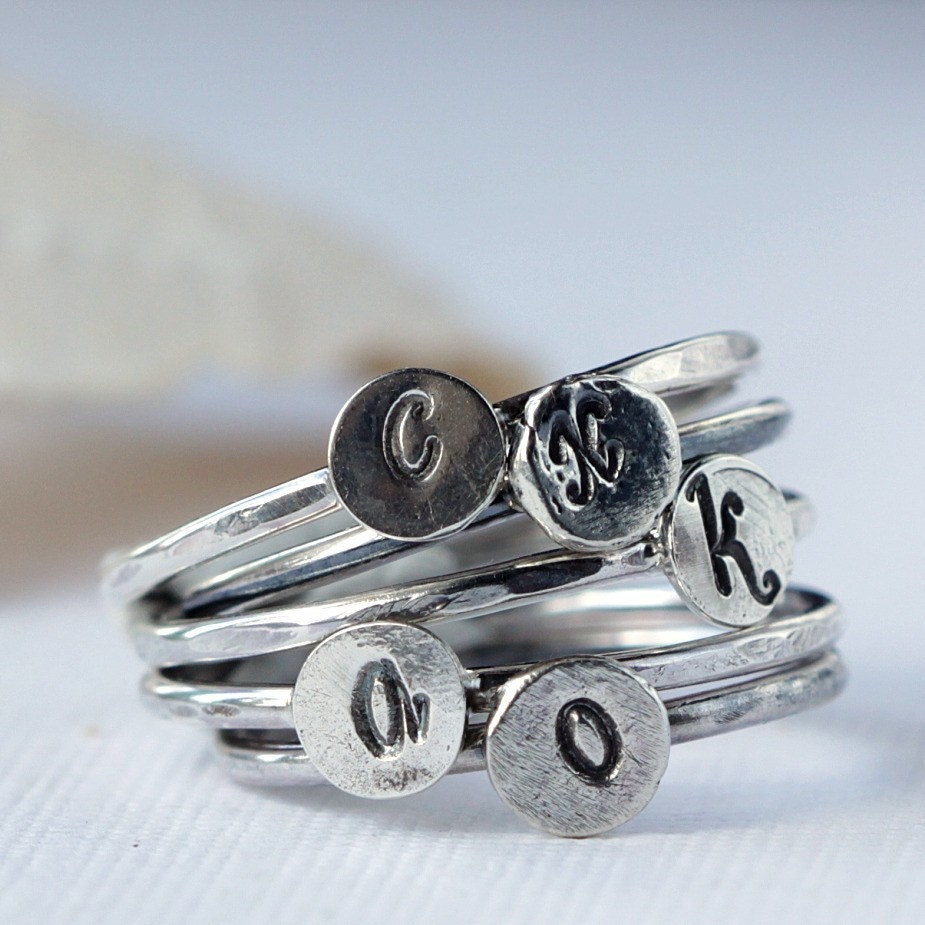
Monogram Initial Sterling Silver Stacking Rings

Cute aren’t they - - love the monogrammed rings!!  Why Oh Why didn’t I give my children names that started with different letters?

She’s getting ready to go on vacation for a couple of weeks, so there isn’t too much in her shop right now, but look through the sold items to see what she has made, then you can have her make a custom piece for you when she gets back!  Just gives you a little time to make your decision!  I’m still trying to decide which piece I “NEED!”

Friday, June 18, 2010

My version (Deployment Project #147)

I have had this picture in my “files” for over a year now - - I absolutely love this shirt.  I have no idea where I found it - - somewhere on the big world wide web!    I decided it was time to see if I could come up with my own version.

elizandaxel-teeflora

I started by buying two identical long sleeve cotton shirts on clearance for $1.99 each from Target.

IMG_5303

Next, I cut out round petal shapes (I did a trial run with some extra jersey fabric I had on hand, just to make sure everything would work as planned, it works out well since you will be able to see the added pieces easily in the pictures.)  Once I knew that my process worked, I did cut all these pieces from the second shirt I bought.  This way I knew that my cotton fabric was going to match perfectly.

IMG_5288 IMG_5289 

After I cut the petal pieces, I ran them through my sewing machine.   Sewing a straight line down the center of the petal so that I could “ruffle” them.

IMG_5290

Next, I ripped various sized strips of fabric.  Ranging in size from 1” – 2 1/2” wide.

 IMG_5293

I ran these through my sewing machine also.

 IMG_5295

Then I pulled the bobbin thread and “ruffled the long strips.

 IMG_5291

Now it was time to get artistic!  I started pinning my ruffled pieces onto my shirt.  Starting at the shoulder and adding pieces until it had the look that I wanted.

 IMG_5302

 IMG_5299 IMG_5300IMG_5297 

After I was satisfied that it was going to work, I cut apart my second shirt and did the entire process with the grey fabric.

IMG_5408IMG_5405

Since I bought the shirts on clearance, they were long sleeved.  A good thing for giving me lots of fabric to work with, but it is summer now, and it is HOT and HUMID here.  I am not a patient person (meaning, I did not want to wait until fall to be able to wear my new shirt!)  So I put the shirt back on my twin, then put one of my favorite tanks over the top.  I marked the armholes for the tank and cut my black shirt along those lines.

 IMG_5406 IMG_5407

Next, I cut a couple more strips 1” wide.  I folded them in half and attached those around the arm holes.  I just left the rough side to the edge since I wanted it to continue having the raggedy edge.

  IMG_5408

What do you think?  I’m quite pleased with the finished product!!

 IMG_5414

IMG_5411 IMG_5413

Thursday, June 17, 2010

One of those weeks (Deployment Projects #143-146)

This has just been one of those weeks!  Charise has not been feeling well all week, and after having a low-grade fever for the last 4 days, I thought I was time to get her in to the Dr. this morning.   After some x-rays and an exam turns out she has pneumonia.  I guess that explains why she has been so miserable.  This week has consisted of a lot of cuddling and movie watching!  It means I didn’t get much done creative wise, but it sure was nice to have an excuse to just sit with my little princess!!  Now that she’s on some good meds, hopefully she will be on the mend soon!

I’ve also been dealing with a sick van.  It’s sickness is completely my fault.  It is our old van  - - the one Handsome Hubby drives when he isn’t on an “all expense paid 9 month long vacation to a sandy beach with no ocean.”  I knew I was supposed to drive it every once in a while, or at least start it up and let it run.  But life got in the way, and I just kinda forgot about it.  So, I’m paying the consequences now.  Just another thing to add to the to-do and deployment stresses list!

Last weekend, before my wee one got sick, the kids and I started on a big project around here.  We are working on switching their rooms so they both have what used to be the other person’s room.  Yikes!  That was a lot of work!  We had to switch room because Charise’s window faced the front of the house (aka the sidewalk where all of her friends would come to socialize with her after she was supposed to be in bed) and she in not one that makes modesty high on her priority list if you know what I mean!  So, we decided that it would be best to make an adventure of the two of them switching rooms and getting their rooms decorated how they wanted. - - That was a dumb idea!

IMG_5402

Look at all these displaced stuffed animals out in the hallway, waiting to be moved to their new room.

I have far too many ideas of what my kids rooms should look like for me to tell them that they can have it how they want it!

For today, you just get a peak at some of the projects I have been working on for both of their rooms, and hopefully by the beginning of next week I will be finished and I can post the final pictures!

Lots of pillows - - of course!  Can you see what I used instead of cording?

IMG_5391 

This was a fun project using leftovers from curtains - - more on that tomorrow!

IMG_5397

And of course some embroidery!

IMG_5399 

A sneak peak at some hardware going up.

IMG_5403 

And of course some great Craigslist finds!

IMG_5404

Have I left you wondering and guessing as to what goes where and what it all looks like?  Yeah - - I’m wondering myself!!  How do I make their ideas and my ideas gel?  We will see what we all come up with!

Monday, June 14, 2010

Tooth Fairy Pillows (Deployment Projects #136 -142)

I had a friend ask me if I could make some Tooth Fairy Pillows for her boys.

Her only requests:

1. use fabric scraps that I had on hand and

 IMG_5383

2. Personalize them.

IMG_5381

Easy!

I thought they turned out pretty cute and the best part is that they were quick little projects, that let me be creative.  A nice break from the large demanding re-upholstery jobs!

We’ve been busy around here finishing up our school year.  Today was our last day of testing - - woohoo!!!   We are going to continue doing some schoolwork every day through the summer.  One to keep us busy and make the time go quickly till Handsome Hubby comes home and two, because I want to keep moving forward and not have to re-teach everything at the beginning of the year next year!

Tuesday, June 8, 2010

Quick and Easy Dress to Skirt (Deployment Project #135)

Today, I’m sharing a super easy project I did last week.  And when I say super easy, I mean super easy and super fast!!!  I actually did this in about 5 min. (including taking pictures) last week in the morning before we left for a day out on the town!!

I found this Liberty of London dress on the clearance rack at Target for $4.  I absolutely love the print of the fabric, but the shape and cut of the dress was doing absolutely nothing for me.

IMG_5305

So, I made it into a skirt!  In a very simple, almost primitive manner!  First thing I did was cut the top halter of the dress off.

IMG_5306

Two separate pieces - - I just threw the top part away, it wasn’t really a big enough scrap to do anything with - - although, now I’m thinking I should have saved it and made a fabric flower to embellish the shirt I wear with the skirt.   Oh well, too late now!! 

IMG_5308

Next, I made a simple folded over top hem and sewed my elastic directly on top of the hem, stretching the elastic  as I went, which made the skirt ruffle up perfectly when I was done.

IMG_5309

Quick, Easy and Fabulously cute!!!

   IMG_5337

Sunday, June 6, 2010

A Perfect Fit (Deployment Project #134)

Last Friday I drove up to Leesburg, VA and met my good friend Kristi at Old Lucketts Store.

IMG_5344

The description from the Virginia Visitors website describes it this way:

The Old Lucketts Store, is a beautiful, 3-story landmark building that was originally built in 1910.  This historic building was once the post office, general store, then the Lucketts family home. The building has since been restored and is the home to over 20 antique dealers and is overflowing with vintage furniture, lighting, collectibles,  garden artifacts, linens, and accessories.  The Old Lucketts Store motto is, "You never know what you might find."

It’s true - - you just don’t know what you will find.  It was a quick slightly more than an hour drive there (of course, it took me 2 hours to get back home because it was Friday night DC traffic) but it was a pretty drive through Virginia country and through many Civil War battle fields.  (my kids were staying with a friend for the day, but as I drove, I was actually considering taking a “field trip” in that direction for the kids to see the battle fields and then we could somehow magically end at Lucketts! - - think they would catch on?)

I went not needing anything but knowing that I would find something I couldn’t live without!  Look what I found:

IMG_5340

An old fireplace mantle!  If you remember back at Christmas time, I had a big mantle fiasco, all stemming from the fact that in our rental home, we just have a big hole in the wall fireplace between two windows - - no mantle, just a big blank wall.    So when I saw all the mantles at Luckett’s, I knew I NEEDED one!!

IMG_5341

I know, it looks pretty rough here, but this is what it looked like when I brought it home.  I literally had a 1/4” to spare when I put it in the back of the truck (good thing the kids weren’t along because I had to fold their seats down!)  I was super impressed with the prices and selection.  There were probably a good 10-12 mantles there and 3 or 4 that I was seriously considering.  But this one stole my heart - - and didn’t break the pocketbook at the same time!!  The best combination!  I paid $65 for it.  I thought that was a great deal!!

IMG_5345

I brought it home, washed it down twice with degreaser and a mold and mildew remover.  The mantle cleaned up pretty well, and I really loved the crackly paint.   It looks like it had been painted about 10 times!!  Once I got done washing it down and it dried, I brought it in to check out the size - - you would not believe it, but it fit PERFECTLY!!!  Right between the two windows with just a 1/2” to spare and the opening was exactly the size it needed to be!!

IMG_5346 

Do you see that little spot between the window sill and the mantle frame?

But, I didn't’ like the finish on it once I brought it inside - - it still looked really dirty to me, so I gave it a couple of quick coats of white paint.

IMG_5344

Then I hot glued white felt over the entire back so that it wouldn’t leave any rub marks or old soot marks on the walls.


Next, I needed to secure it to the wall.  I didn’t want my Christmas fiasco to happen again!!  I used two super heavy duty door magnets.  I screwed the large part to the back of the mantle (there was a perfect little indentation that they fit right in.  Then I screwed the metal piece to the wall.  I had to put a 1” block of wood behind the metal plate to make up for the trim that was around the fireplace.      Let me tell you, these baby’s are tight!  This mantle is not moving!!  It takes quite a bit of muscle to “disconnect” my mantle from the wall!!

IMG_5349 IMG_5348

Do you see the small board with the metal piece?  The magnet is STUCK to that piece!!  The gap between the wall and the mantle is about an inch, but my curtains butt up right next to the mantle so you can’t see it from the side.  You can’t see it from the front because it is actually in the shadows and the fireplace surround is black.  The only place you can really see it is on the top, but once I accessorize, no one will notice that either!!

If this were our house, I would have just secured it directly to the wall, but since we are just renting, I needed to do something with the least amount of damage to the walls.  Plus, when we move, we can just pack up the mantle and put it in our next house, even if we don’t have a fireplace, we can still put it against a wall and have the architectural element there!

IMG_5342

I love to sit and wonder about the history of this - - what house did it come from?   How old is it really?  Oh, if mantles could talk!!!

IMG_5354 IMG_5343 IMG_5356

Just a few views of the living room with her new jewel!!

IMG_5363 IMG_5358 IMG_5342 IMG_5364

Related Posts with Thumbnails